 Pattern Description: Wardrobe of misses' tops. Made for knits, these tops have neckline and sleeve variations. made view A, the long sleeved version.
Pattern Sizing: 6-22. I made a 14.
Did it look like the photo/drawing? Kinda sorta. I changed some things and left off some other design features, but the base was the same
How were the instructions? Didn't use them. This is a very easy shirt the way I made it. I didn't need them.
What did you particularly like or dislike about the pattern? As I said above, I'm looking to get back my sewing mojo. I thought this would be a good, fast project to jumpstart it. It's a basic design with good bones, and it's easy to make.
What I disliked is that this beast runs BIG. This seems to happen a lot with Simplicity patterns lately. Now granted, I didn't do a flat pattern measurement before cutting, and my bad for that. But for the size 14, they give a finished garment measurement of 37 1/2 at the bust. That should be just fine on me, but this was significantly bigger than that. I've found that sizing in Simplicity's patterns can be pretty hit-or-miss of late. I'll definitely go down at least one size when and if I make this again. It's also lower cut than it looks on the model. It covers my bra, but I may end up layering a cami under it just for extra insurance.
Fabric :Get Ziggy With It jersey from (of course) Gorgeous Fabrics. I love the colors in this fabric. It's a bit mind-bending to work with, and if you have an astigmatism I could see this making your eyeballs vibrate. The trick to working with this kind of busy chevron is to cut your pattern pieces out using a single layer layout. I aligned the grainlines so they ran down the points of the chevron. That made it much easier to get the result I wanted.
Any pattern or design changes? I made a FBA, using the same technique I used for the Simplicity Kimono top I made last year. Here's a picture of the resulting pattern piece.
 I'm going to modify this a bit next time, to curve back upward a bit at the center front. That will make it snug up a bit better. From a design standpoint, I skipped the overlay that the pattern shows. It's a cute idea, but since this print is already very busy, I didn't think it would add much to the top, and might actually end up detracting from the overall effect. I also skipped the ruching on the sleeve and left them plain.
I stayed the shoulders using a tip I published over at BeSewStylish.com I use fusible tricot that I cut 3/4 inch wide by the length of my shoulder seam. I align the edges of the tricot and the back shoulder and fuse. This leaves a little "hangover" into the garment. Apparently my explanation wasn't very clear, and it's easier to demonstrate with a picture, so you can see what I did here:
 This stabilizes the shoulder seam, and the tricot doesn't add any bulk.
Would you do it again? Mmmm, possibly, but probably not. There are lots of other top patterns that I would probably want to make first. This isn't a bad pattern, but I'd rather do something else, you know?
Conclusion: A nice top. It's definitely getting me more interested in hitting the Chanel dress again. I may make one more (a different pattern) before jumping back on that horse.
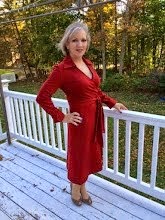
Here's a picture of the finished garment:

Happy Sewing!




16 comments:
Very cute Ann!
I really like this one, Ann. The stripes have such a nice effect.
Very nice! The stripe effect just gives it a little something extra.
OOOh, I love it! The stripes really give it a nice effect.
Your shirt turned out wonderful! I love the stripes.
Your top looks great Ann. I'm still gathering up the courage to cut my fabric! Hope mine looks as smashing as yours!
I am so glad that you decided to make this pattern,Ann. I have this one waiting in the wings.. I really love how it looks with the wiggy ziggy lines! It is also good to know that this pattern runs so big!
Now, I gotta make something with my yardage. I just have to figure out w h a t . . . .
Thanks for the inspiration.
Cute top, Ann!
that's a very nice top and the fabric is really beautiful. I like how you played with the print at the underbust seam
Very Missoni. I cannot sew a button on but I adore beautiful clothes and fine workmanship, so I'm having a great time reading through your blog.
I love the stripe effect! Nicely done.
Great job with the stripes. Does the view you made have the same neckline (with the layers) that the model's view has? Just curious. I want to get that pattern.
Ann .- fabulous top and beautiful fabric.
The "Chanel" suit because I have been wanting to see the outcome. A big hug, Paco
Love the fabric and I think it makes the top look great. Your FBA was a little different than the one you did sometime back. I bookmarked the post. It dealt with wrap or crossover FBA. I am curious how you did this one and how did you determine how much to add to the bottom. I pretty much understand adding length to adjust for the bust curve/mound. I keep having fitting issues with bust and like to understand why choices to use one method over another. Hopefully when you have a moment you can respond.
Ann, I love the top. I too am in a sewing funk caused by a long lasting period of back spasams that have made it difficult to stand at a cutting table, get up-sit down etc. I did get all my Christmas sewing done however, but I have tons to do before the end of March and cannot get started. Ill have to find the inspiration somewhere.
From Tennessee, Charles and I are rooting for the Pats along with you. Our Titans did better this year, but are not playoff ready yet. Too young, and unseasoned an offense this year. I hope PacMan can solve his issues and return with a new appreciation of how fortunate he is, and of how careful one needs to be in one's choice of companions.
Post a Comment